Fail-Proof Christmas Cutout Cookie Recipes: Easy Guide

Table of Contents
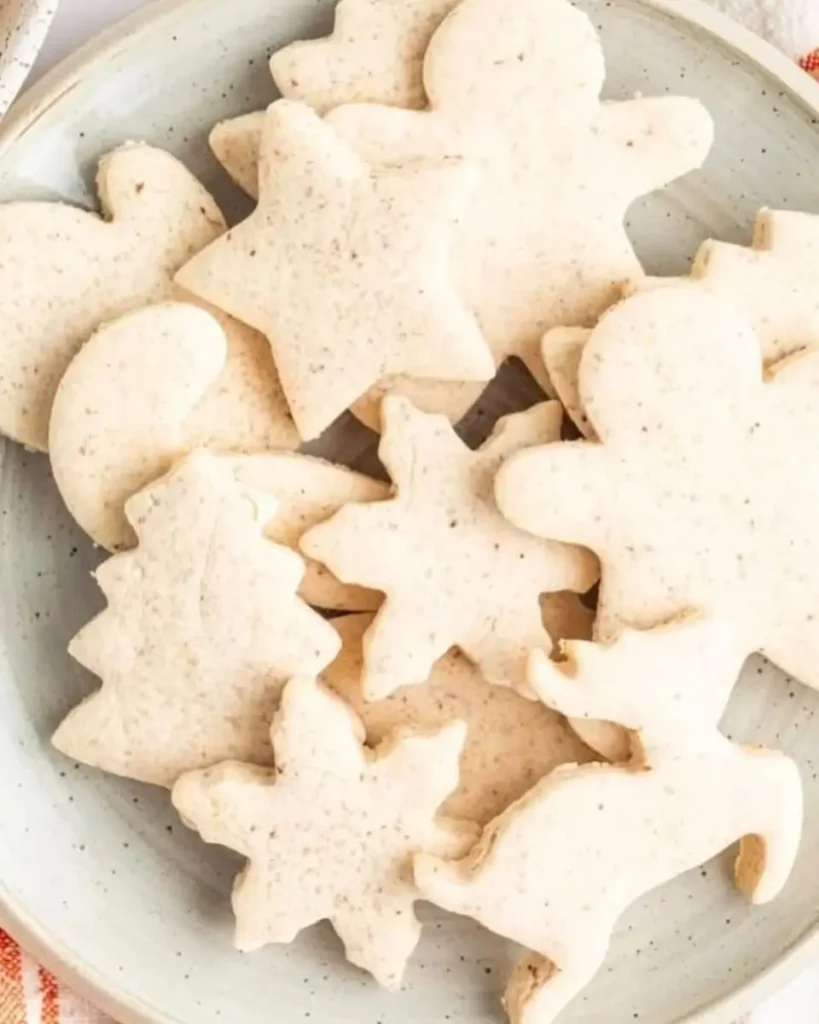
Are you curious about making your holiday baking a lot easier? This comprehensive guide to christmas cutout cookie recipes will show you exactly how to achieve delightfully soft cookies with perfectly crisp edges, ideal for decorating. Plus, learn to create a simple yet stunning glaze – no complicated royal icing needed for these fantastic christmas cutout cookie recipes!
Christmas Cutout Cookie Recipes Details:
| Category | Detail |
| Prep Time | 2 hours (includes initial chilling) |
| Cook Time | 12 minutes per batch |
| Additional Time | 24 hours (for icing to fully set) |
| Total Time | Approximately 26 hours and 12 minutes |
| Yield | About 24 (3-inch) cookies; 1.5 cups icing |
Understanding Your Ingredients for Festive Cookies
Below is a list of what you’ll need. Precision with these components is quite important for achieving the best results with your christmas cutout cookie recipes.
Crafting Your Christmas Cutout Cookie Recipes: A Step-by-Step Guide
Still curious how to bring these delightful treats to life? Here’s our guide to the process:
Dough Preparation: The Foundation for Success
- Combine Dry Ingredients: In a medium bowl, whisk together the all-purpose flour, baking powder, and salt. Set this dry mixture aside for now; it’s an important base for your christmas cutout cookie recipes.
- Cream Butter and Sugar: In a separate large bowl, using either a handheld or stand mixer fitted with a paddle attachment, beat the softened unsalted butter and granulated sugar together on high speed. Aim for a completely smooth and creamy texture, which usually takes about 2 minutes.
- Incorporate Wet Ingredients: Add the room-temperature large egg, pure vanilla extract, and almond extract (if you’re using it for that extra flavor dimension). Beat again on high speed for approximately 1 minute, until everything is well combined. Remember to scrape down the sides and bottom of the bowl to ensure all ingredients are fully integrated.
- Merge Wet and Dry: Gradually introduce the dry flour mixture to the wet ingredients. Mix on a low speed just until combined. The resulting dough will be somewhat soft. If it feels overly soft or particularly sticky, you can incorporate 1 additional tablespoon of flour.
The Chilling Secret for Perfect Shapes
- Divide and Roll (Pre-Chill Method): This step is a bit different from some methods but is quite crucial for success! Divide the cookie dough into two equal portions. Place each portion onto a sheet of lightly floured parchment paper or a silicone baking mat. Using a lightly floured rolling pin, roll each dough portion out to an even 1/4-inch thickness. Don’t be too concerned about achieving a perfect shape at this stage.
- Chill the Dough: Lightly dust one of the rolled-out dough sheets with flour. Place a piece of parchment paper on top of it (this measure prevents sticking). Then, carefully place the second rolled-out dough sheet on top of that parchment. Cover the entire stack with plastic wrap or aluminum foil. Refrigerate for a minimum of 1-2 hours, or even up to 2 days if that suits your schedule. This chilling period is an essential step for ensuring your Cut Out Sugar Cookies maintain their defined shapes during the baking process.
Baking and Cooling Your Masterpieces
- Prepare for Baking: Once the dough is thoroughly chilled and firm, preheat your oven to 350°F (177°C). Line 2-3 large baking sheets with parchment paper or silicone baking mats – this is a key part of how to bake cookies successfully and makes cleanup easier.
- Cut and Arrange Cookies: Carefully take one chilled dough slab from the refrigerator. If it’s a bit resistant to lifting from the bottom surface, gently run your hand underneath the parchment or mat to help release it. Using your favorite cookie cutters, cut the dough into your desired festive shapes. Gather any remaining dough scraps, re-roll them to the same 1/4-inch thickness, and continue cutting until all the dough from that slab is utilized. Repeat this process with the second slab of dough.
- Bake to Perfection: Arrange the cut-out cookies on your prepared baking sheets, ensuring you leave about 3 inches of space between them to allow for any slight spreading during baking. Bake for 11–12 minutes, or until the edges are just lightly browned and the centers are set. If you know your oven tends to have hot spots, it’s a good practice to rotate the baking sheets halfway through the bake time for more even results.
- Cool Completely Before Decorating: Allow the cookies to cool on the baking sheets for about 5 minutes. This short period helps them firm up slightly before you carefully transfer them to a wire rack. It’s crucial that they cool completely before you begin the fun part: decorating with your sugar cookies and icing.
Creating Simple and Stunning Sugar Cookies and Icing
This icing is a fantastic, less fussy alternative to traditional royal icing.
- Mix Icing Ingredients: In a medium bowl, combine the confectioners’ sugar, pure vanilla extract (if using for flavor; omit for whiter icing), light corn syrup, 4.5 tablespoons of the room temperature water, and the pinch of salt. Begin by using a fork to stir these ingredients together. You’ll notice the mixture will be very thick and may seem quite challenging to combine at first.
- Achieve the Ideal Consistency: Switch from the fork to a whisk. Vigorously whisk in the remaining 1/2 tablespoon (8ml) of water. You are aiming for a specific consistency here: when you lift the whisk and allow the icing to drizzle back into the bowl, the ribbon of icing should briefly hold its shape for a few seconds before smoothly melting back into the main body of icing. If it still seems too thick (which can sometimes happen), incrementally whisk in a tiny bit more water (perhaps another 1/2 tablespoon or even less) until you reach this ideal state.
- Color Your Icing (If Desired): If you’re envisioning beautifully colored christmas cutout cookie recipes, now is the moment to tint your icing. Should you wish to use multiple colors, divide the prepared icing into separate small bowls. Add your gel food coloring very sparingly to start—just 1–2 drops at first. Stir it in thoroughly to distribute the color evenly, then add more, drop by drop, as needed to achieve your desired shade. It’s useful to keep in mind that icing colors tend to deepen slightly as the icing dries.
- Decorate Your Cooled Cookies: You have a couple of excellent options for applying this simple glaze. You can gently dip the tops of your completely cooled cookies directly into the bowl of icing. Alternatively, for more detailed or intricate work, use squeeze bottles or piping bags (either reusable or disposable ones work well) fitted with a piping tip (a Wilton Piping Tip #4 is often recommended and works well for this type of decorating). A common and effective technique is to outline the cookie shape with icing first, then “flood” or fill in the center area. If you plan to adorn your cookies with sprinkles, be sure to add them immediately after applying the icing to each cookie so they adhere properly as the icing begins to set.
- Allow Icing to Fully Set: While you can certainly enjoy your delicious cookies before the icing has completely dried, for purposes of stacking, storing for later, or gifting, it’s highly advisable to let the icing set completely. This process typically takes about 24 hours at normal room temperature. There’s no particular need to cover the cookies as they dry. If it’s helpful and you have space, you can decorate the cookies directly on a baking sheet and then place the entire sheet in the refrigerator; this may help slightly speed up the icing setting process.
Tips for Top-Tier Christmas Cutout Cookie Recipes Success
- Butter Temperature is Key: To truly elevate your christmas cutout cookie recipes, ensure your butter is at the correct room temperature – it should be cool to the touch, approximately 65°F (18°C). If butter is overly warm or melted, your cookies may spread excessively during baking, losing their defined shapes.
- Flavor Variations: While the hint of almond extract is lovely, feel free to explore! Consider adding a teaspoon of finely grated lemon or orange zest to the dough for a bright, citrusy note, or perhaps 1/2 teaspoon of ground cinnamon for a touch of warmth. This base dough for cookie recipes sugar cookies is wonderfully adaptable cookie recipes sugar cookies
- Proper Flour Measurement: Spoon your flour into the measuring cup and then level it off. Scooping directly from the bag can compact the flour, leading to too much flour in your dough, which can result in dry or tough cookies.
- Don’t Overbake: Keep a close eye on your cookies. You’re looking for lightly browned edges. Overbaking can make them hard rather than achieving that desirable soft center with crisp edges.
Storing Your Creations: Once the icing on your christmas cutout cookie recipes is fully set (after about 24 hours), they can be stored in an airtight container at room temperature for up to 5 days. For longer storage, undecorated or fully set decorated cookies can be frozen for up to 3 months. Layer them between sheets of parchment paper in a freezer-safe container. Thaw them in the refrigerator or at room temperature before enjoying.
If you’ve found this guide to creating delightful christmas cutout cookie recipes helpful, why not pin it for later and share it with your fellow baking enthusiasts to spread the holiday cheer!
Frequently Asked Questions (FAQ) About Christmas Cut Out Cookie Recipe
What is the most popular cookie during Christmas?
Sugar cookies are widely popular, especially those cut into festive shapes.
What is the secret to cut out cookies?
Chilling the dough well is crucial for maintaining shapes during baking.
Can I use premade cookie dough for cutouts?
While possible, homemade dough generally provides better flavor and texture.
What is the least favorite Christmas cookie?
Preferences vary, but fruitcake cookies sometimes receive less enthusiasm.

Christmas Cut Out Cookie Recipe
Equipment
- 1 Medium bowl For dry ingredients
- 1 Large bowl For wet ingredients and mixing dough
- 1 Whisk For dry ingredients and icing
- 1 Electric mixer Stand or handheld
- Several sheets Parchment paper For rolling and lining baking sheets
- 1 Rolling Pin
- Various Cookie cutters Festive shapes
- 2-3 Baking sheets
- 1 Wire rack For cooling cookies
- Optional Squeeze bottles or piping bags For decorating with icing
Ingredients
For the Cookies
- 2 1/4 cups All-purpose flour Spooned and leveled
- 1/2 tsp Baking powder
- 1/4 tsp Salt
- 3/4 cup Unsalted butter Softened
- 3/4 cup Granulated sugar
- 1 Large egg Room temperature
- 2 tsp Pure vanilla extract
- 1/4 – 1/2 tsp Almond extract Optional
For the Easy Icing
- 3 cups Confectioners’ sugar
- 1/2 tsp Pure vanilla extract Omit for stark white icing
- 2 tsp Light corn syrup
- 4.5 – 5 Tbsp Room temperature water
- Pinch Salt Optional
- To taste Gel food coloring & sprinkles For decorating
Instructions
- Combining the Dry: In a medium bowl, whisk together the flour, baking powder, and salt. This ensures even distribution of the leavening agent.
- Creaming the Wet: In a large bowl, cream together the softened butter and sugar until light and fluffy. This step is crucial for a tender cookie.
- Incorporating Egg and Flavor: Add the egg, vanilla, and almond extract (if using) to the creamed mixture and beat until well combined.
- Blending the Dough: Gradually add the dry ingredients to the wet ingredients, mixing on low speed until just combined. Avoid overmixing.
- Dividing and Rolling: Divide the dough in half, place each portion between sheets of parchment paper, and roll to about 1/4-inch thickness.
- Chilling the Dough: Stack the rolled-out dough sheets and refrigerate for at least 2 hours, or up to 2 days. Chilling is critical for preventing spreading.
- Preheating and Cutting: Preheat your oven to 350°F (177°C). Remove the chilled dough and use cookie cutters to cut out shapes. Reroll scraps.
- Baking to Perfection: Place cookies on prepared baking sheets and bake for 11-12 minutes, or until lightly browned around the edges.
- Icing Preparation: While cookies bake, prepare the icing by whisking together confectioners’ sugar, vanilla, corn syrup, water, and salt. Adjust water for consistency.
- Decoration and Drying: Decorate cooled cookies with icing, sprinkles, or other desired decorations. Allow the icing to dry completely (approx. 24 hours) before storing.
Notes
- Butter Consistency Matters: Ensure your butter is softened but not melted.
- Chilling is Mandatory: Do not skip the chilling step. It’s the key to preventing spreading.
- Icing Consistency: Adjust the water in the icing gradually to achieve the desired thickness.
- Flavor Variations: Experiment with different extracts or spices to customize the flavor.
- Storage: Store decorated cookies in an airtight container at room temperature once icing is fully set.
Did You Try Our Recipe?
There are no reviews yet. Be the first one to write one.

One Comment